


1. Users
Let us consider two users of a system namely Phanee and Gopi.
Phanee may have some set of privileges and Gopi may have some set of privileges, which may or may not be equal. Every user has their home directories where the user’s specific files are stored.
Linux uses the UID to recognize the user who is currently using the system. It is used GID to recognize the group. Every group may have a different set of permissions.
Example: Phanee and Gopi are different users.
Example: Web developers, DevOps, and DBMS are different groups.
There can be more users in the system other than you as a user, now these users make sure that every process in the system is running perfectly fine.
Example: Some of the users are responsible for showing GUI, likewise there can be different users for different processes in the system.
The most powerful user in the system is root user, also known as Super user.
It can access any file in the system.
It can start/stop any process of the system.
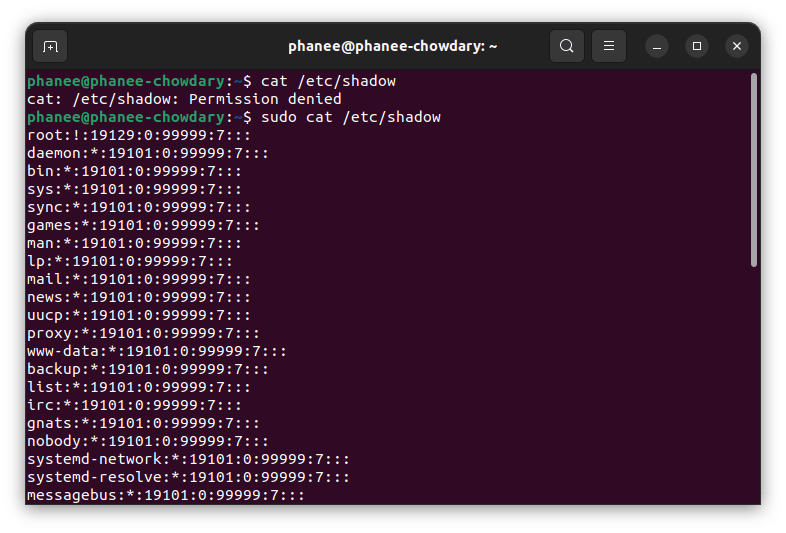
There may be some files which cannot be accessed by a normal user. To access this kind of file you can use sudo the command. Sudo stands for Superuser do.
cat /etc/shadow
sudo cat /etc/shadow
To make the current user a superuser use the following command :
sudo su
exit
exit command is used to exit from being a superuser and become a normal user.
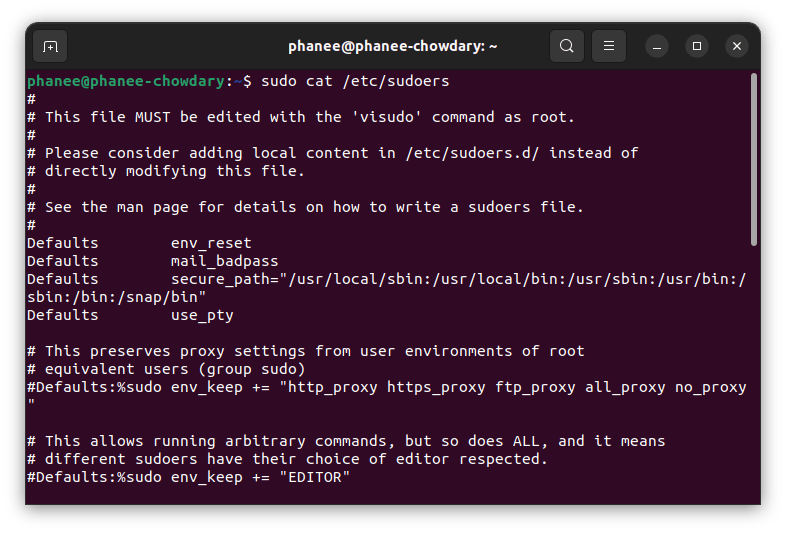
To know who the users can use sudo the command use the below command.
sudo cat /etc/sudoers
It's not a good practice to use sudo command all the time because if you have root privileges then you might delete some files in the system and end up with a system crash or some other issues. So use it only if it's needed.
Downsides of being a superuser
You might delete critical files and end up crashing your OS.
History will not be saved when you are running any commands as a superuser.
If you wish to see all the user’s details in the system use the below command :
sudo cat /etc/passwd

or

cat /etc/passwd
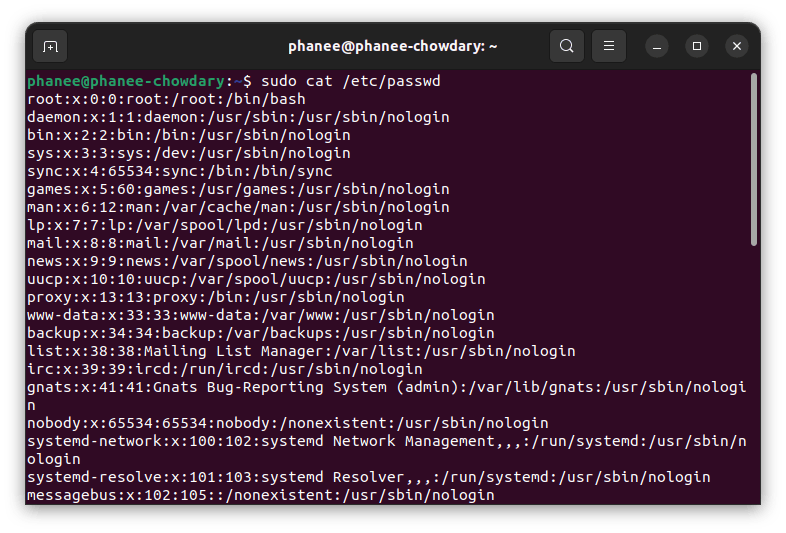
Details of a user.
To see the content in this file use:
cat /etc/passwd
Let's consider the first user in /etc/passwd file and try to understand.
root:x:0:0:root:/root:/bin/bash
This can be divided into 7 fields:
1 -
root(Username).2 -
x
Password ('x' represents that the password will be stored in/etc/shadow).3 -
0
UserID4 -
0
GroupID the user belongs to.5 -
root
Additional user info.6 -
/root
User home directory.7 -
/bin/bash
User's shell.
More about /etc/shadow password files.
This file actually contains encrypted passwords of the user's account.
To see the content in this file use:
sudo cat /etc/shadow
root:!:19129:0:99999:7:::
Let's consider the numbering as below:
1 -
root(Username)2 -
!
Password, '!' represents that the password is encrypted.3 -
19129
Date of last password changed i.e., no of days since Jan 1, 1970.4 -
0
Minimum password age, in this case user can change the password after 0 days.5 -
99999
Maximum password age, here 99999 represents that after these many days user should change the password.6 -
7
Warning period for a password (Before 7 days expire it warns the user to change the password).7 -
Password expiry period. Blank represents no expiry for the password.8 -
Account expiration date. Let’s say if its value is 3 then after 3 days user account will be expired. Blank represents no expiry for an account.9 -
Reserved field, even developers have not figured out for what purpose this field is used. This is something that may be useful for future generations.
If you observe the previous command which is cat /etc/passwd we may or may not use sudo to access passwd file but here to access shadow file which contains encrypted passwords in it we should use sudo command. This is more about user permissions which we will be learning in the next blog.
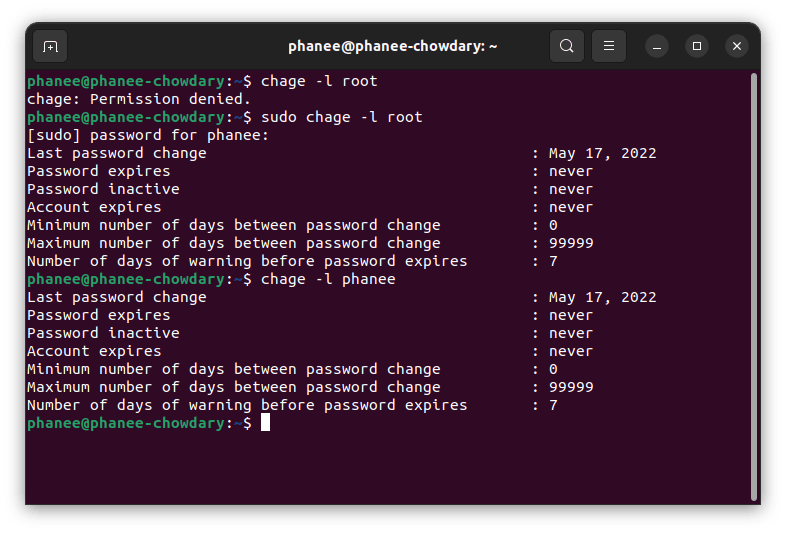
chage
A user can check password expiration details using chage command
chage -l user_name
To see the root user password expiration details.
sudo chage -l root
I have used sudo because as a normal user, I have no permission to access the root files.
2. Groups
A group is a collection of users. The purpose of creating a group is to define a set of privileges for a given resource that is shared among users in the group.
To view the groups in the system :
cat /etc/group

Details of a group.
root:x:0:
This is divided into 4 parts :
1 -
root
Group name.2 -
x
Group password.3 -
0
GroupID.4 - List of Users in the group.
Create, Delete Users & Groups
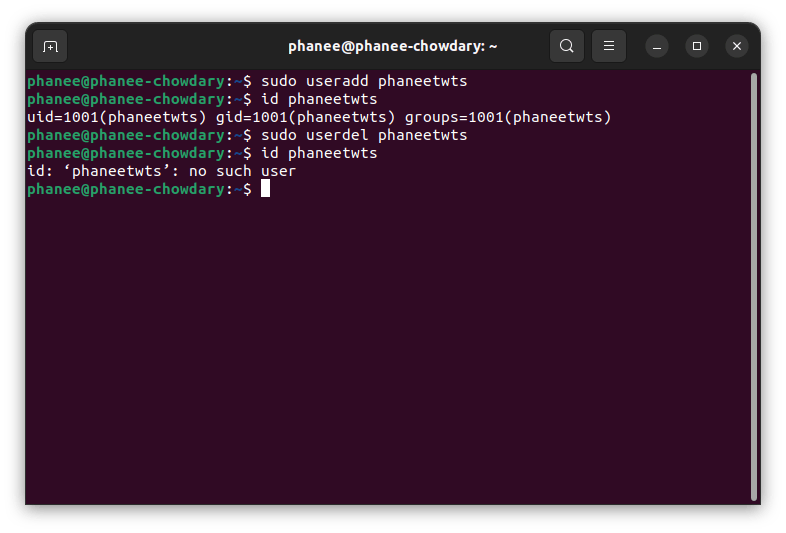
Create user :
sudo useradd user_name
You can confirm whether user-created or not by using this command:
id user_name
Or you can use cat /etc/passwd to verify whether the user is created or not.
After creating a user using the above command, user directories have not been created inside the/home directory. So new users cannot log in to his/her account.
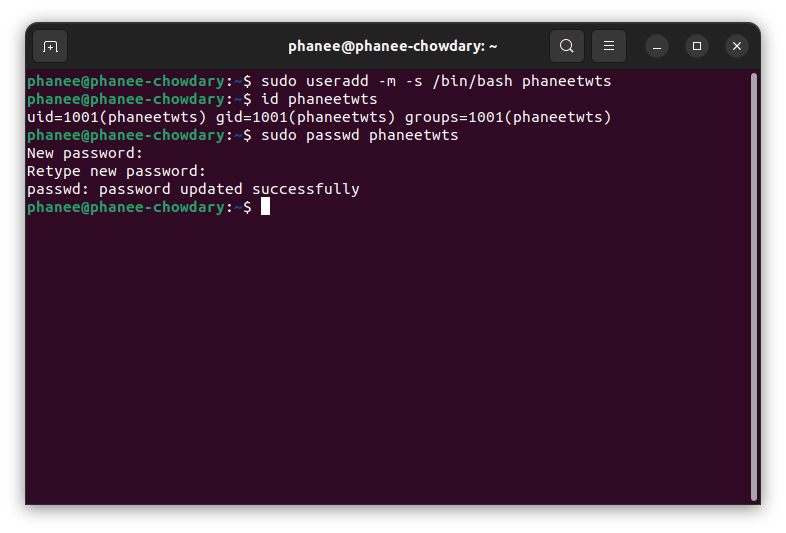
To create a new user with its directories :
sudo useradd -m -s /bin/bash user_name
Now, after executing the above command if you navigate to /home directory you can observe new directory with the mentioned username is created.
Now you need to set a password to the newly created user using :
sudo passwd user_name
You can observe that creating a user takes a lot of commands, there is one command that automates this entire process :
sudo adduser user_name
After setting up a username and password you can log in into your account in 2 ways:
GUI.
Execute
su - user_namein terminal.
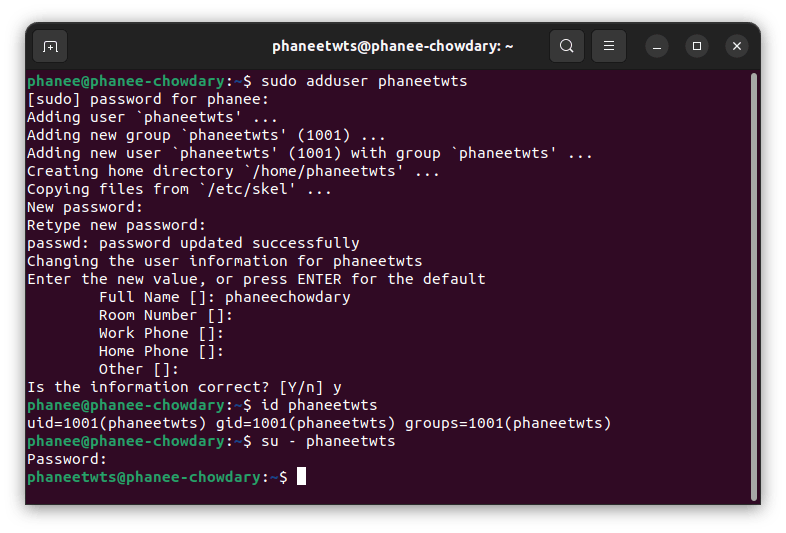
In the above picture after changing the user using su command username has been changed from phanee to phaneetwts.
Delete user
Like creating a user, there are 2 commands for deleting a user
sudo userdel user_name
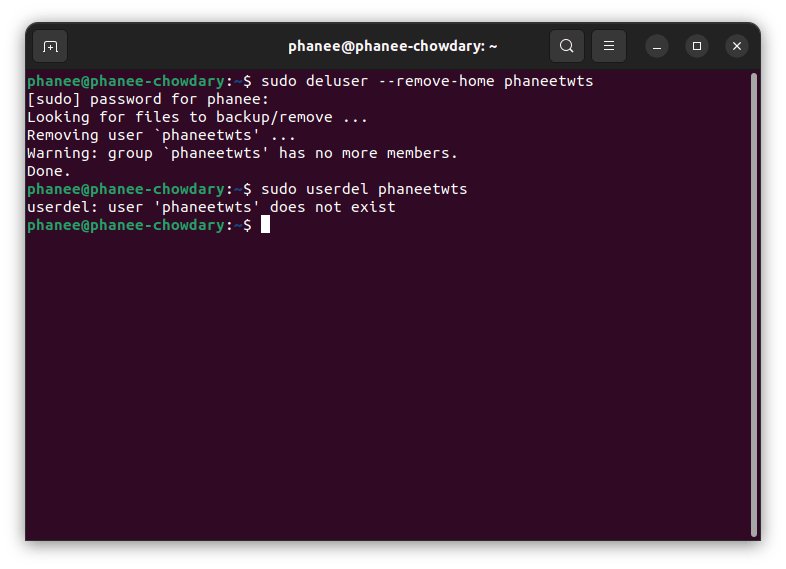
If you observe the /home directory of the new user has not been deleted, can be deleted using this command :
sudo deluser --remove-home user_name
Create group
sudo groupadd group_name
Add users to groups
sudo usermod -aG group_name1, group_name2 user_name
Delete users from the group
sudo gpasswd -d user_name group_name
Delete Group
sudo groupdel group_name
Change user’s primary group
sudo usermod -g group_name user_name
Create user and assign groups :
To add a user to a primary group use useradd followed by -g and -G to add secondary groups to the user.
sudo useradd -g primary_group -G secondary_group1, group2 username
To check the information of the user, including all the groups of which the user is a member of use id command followed by username.
id phanee
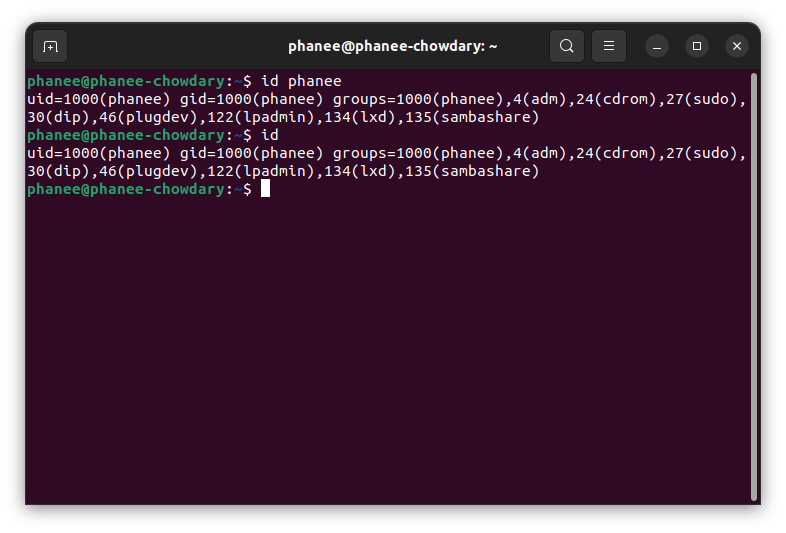
Though you ignore username the above command you will get details of the current user.
More about user and group permissions in the next blog :-)